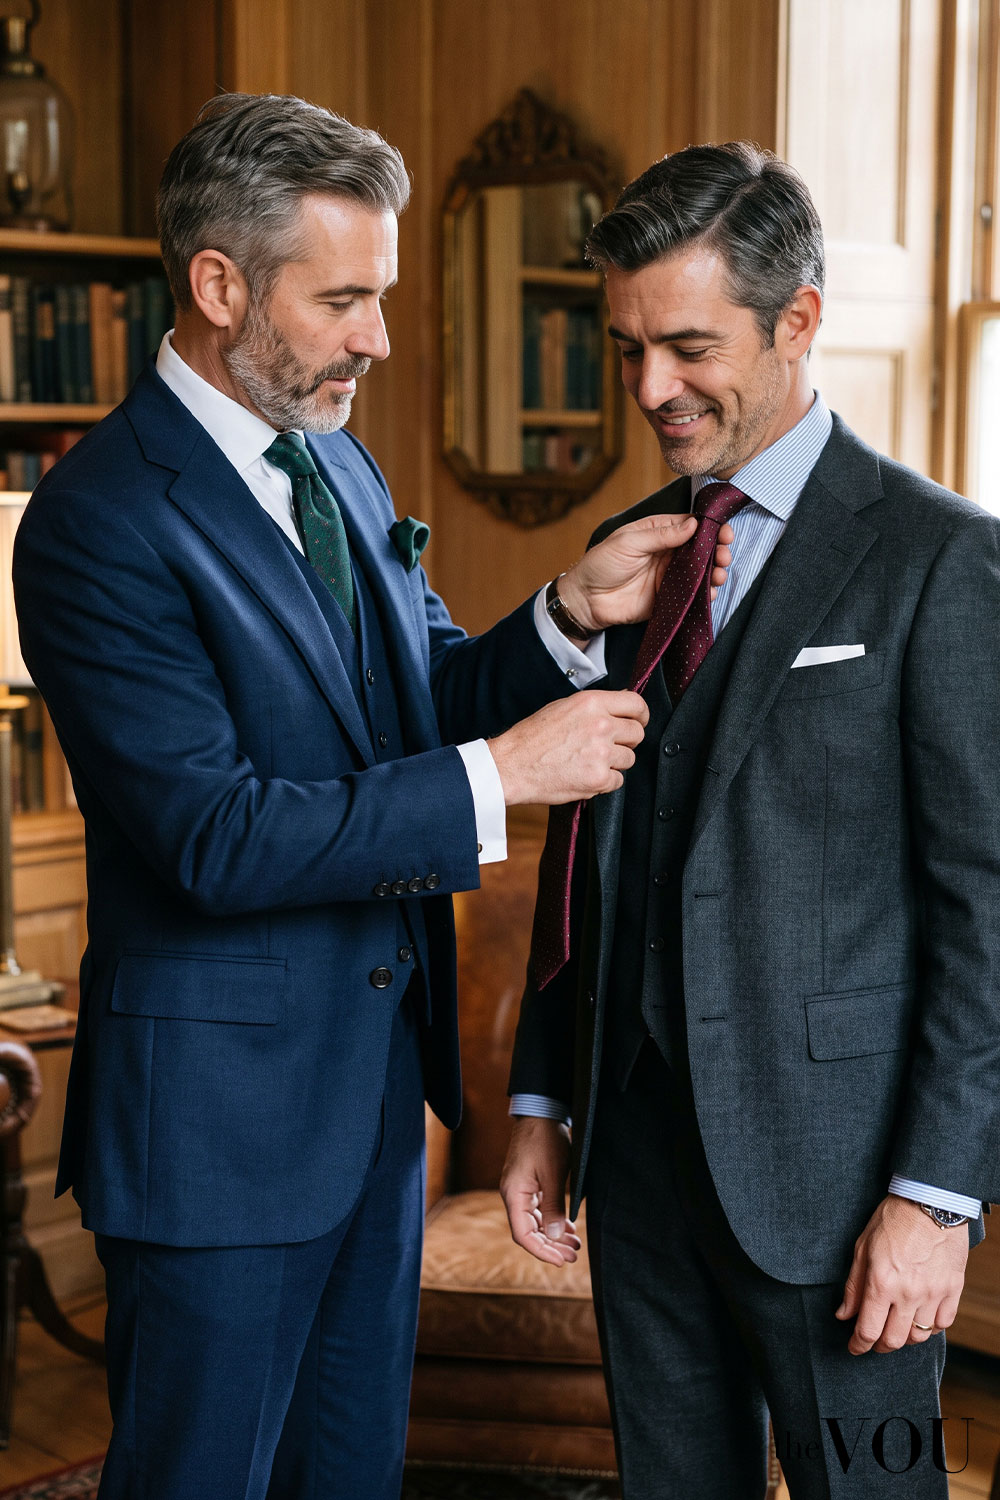
You have an interview in an hour, a wedding on Saturday, and a school tie that has beaten you all term; you need the knot done now, without wasting hours on Youtube.
Learning how to tie a tie is two angles skill:
1. the moves
2. the judgment
Here are the four main knots worth knowing, in six to eight diagrammed steps each, plus which knot belongs on which collar, face, fabric and occasion.
How to Tie a Tie – The Only 4 Tie Knots You Need
In The 85 Ways to Tie a Tie, Cambridge physicists Thomas Fink and Yong Mao calculated that 85 knots are possible within nine moves, only about 13 of them worth wearing (Wikipedia, “Necktie”).
You need four – four-in-hand, half Windsor, full Windsor, Pratt – and the first three are exactly what US Army and Navy uniform regulations prescribe wherever a necktie is worn (Wikipedia, “Four-in-hand knot”).
A knot is only as sharp as the suit under it – start with why men must wear suits. This page is neckties only; bow ties get their own guide.
The tie descends from the knotted neckerchiefs of Croatian mercenaries in French service during the Thirty Years’ War (1618–1648), copied by Parisians as the cravat – named for the “Croates” – and adopted young by Louis XIV around 1646 (Wikipedia).
The first long, work-ready tie is credited to Castell & Son of Oxford in 1870, a thread traced in our guide to Victorian men’s fashion (Wikipedia); Jesse Langsdorf’s 1923 bias-cut patent (US 1,448,453) is why today’s blade falls straight instead of twisting (Wikipedia).
Before You Start – Tie Anatomy and the Belt-Buckle Rule
One convention: steps below are from your own viewpoint looking down – your left is your left-hand side.
The wide end you tie with is the blade, its point the tip, the stitched spine the seam, the hidden interlining the tie’s body.
An interlined silk or chunky knit builds a bigger knot with the same moves, so thickness belongs in your knot choice.
Drape the tie seam-in for the first three knots; the Pratt alone starts seam-out. Use a mirror for week one; then tie by feel.
Length: the finished tip should land at your belt buckle – the standard every maker repeats (Charles Tyrwhitt).
With a four-in-hand, start the wide end about 12 inches (30 cm) below the narrow end (Charles Tyrwhitt) and adjust an inch at a time.
The Windsors eat more length and the Pratt least (Wikipedia, “Pratt knot”), so tall men, short ties – and shorter men whose Windsor lands past the buckle – should lean four-in-hand or Pratt.
Which Knot Should You Tie? The 30-Second Selector
Four questions, in this order:
- Collar. Narrow point or button-down: four-in-hand. Medium spread: half Windsor or Pratt. Wide spread or cutaway: full Windsor. Cannot name your collar? Start with our collar-styles-for-face-shapes guide.
- Face. Wide knots balance long, narrow faces; compact knots keep vertical line and flatter round faces (TheVou collar methodology).
- Fabric. Thick ties make big knots: heavy knits want the four-in-hand; fine silks can afford a Windsor.
- Occasion. Interviews and weddings: half Windsor. Daily business: four-in-hand. Maximum presence: full Windsor.
Elegance is a knot proportional to your collar, your face and your lapels – never knot acrobatics.
1. The Four-in-Hand Knot (The One 90% of Men Should Wear)
The four-in-hand – schoolboy knot, cravat knot or simple knot – produces a narrow, notably asymmetric knot with a natural slight lean.
The imperfection is the point: it reads as ease rather than effort.
How to Tie a Four-in-Hand Knot In 6 Steps
- Collar up, seam-in, wide end on your right, tip roughly 12 inches below the narrow end’s.
- Cross the wide end over the narrow end to your left.
- Pass it behind the narrow end to your right — the crossing you just made becomes the knot’s face.
- Bring it back across the front to your left, over the first crossing.
- Bring it up through the neck loop — the gap between knot and collar — and let it hang over the front.
- Feed it down through the band from step 4, pinch the knot’s face, slide to the collar and cinch. Set the dimple now.
When to Wear the Four-in-Hand
Collar logic first – and our two sources disagree, so take the reasoning, not a rule.
OTAA pairs it with narrow collars and warns that a wide collar leaves a visible gap beside a slim knot (OTAA); Charles Tyrwhitt lists cutaway, narrow and rounded collars (Charles Tyrwhitt).
The shared principle: a knot fills the space between the collar points — slender knots under closer points, wider knots under spread.
Beyond collars, it is the natural partner for thick knits, whose bulk would turn a bigger knot into a fist, and its compact shape flatters a rounder face. Daily business, school, dinner: the default.
Four-in-Hand History in 30 Seconds
The name most likely comes from the 19th-century London Four-in-Hand Club whose members wore the neckwear; rein-knot and scarf-draping theories also circulate.
It became the knot of collegiate American dress – see our Ivy League style guide – and has outlived every “improvement” since.
2. The Half Windsor Knot (The Versatile Middleweight)
The “single Windsor” sits between knots – larger than the four-in-hand and Pratt, smaller than the full Windsor – a neat triangular knot best in light- and medium-weight fabrics (Wikipedia, “Half-Windsor knot”).
If you must learn only two knots, this is would be the second.
How to Tie a Half Windsor Knot in 7 Steps
- Same start: seam-in, wide end on your right, tip about 12 inches below – a touch lower if the tie runs short.
- Cross the wide end over the narrow end to your left.
- Wrap it behind the narrow end to your right.
- Bring it up through the neck loop and drop it down across the front to your left – one edge of the finished triangle.
- Bring it across the front to your right, over the diagonal.
- Bring it up through the neck loop again, from behind, so it hangs over the knot.
- Feed it down through the band from step 5, hold the narrow end low, slide up, cinch – dimple, then collar down.
When to Wear the Half Windsor
Under a medium-spread collar it is the most balanced look in menswear – the interview and wedding default: symmetrical for photographs, sized for business.
It keeps light silks standing smart without bulk; for wardrobes working this hard, professional image consulting repays itself.
The Self-Releasing Variant
Tied in its common “knot 8” form, the half Windsor is self-releasing: pull the narrow end and it falls apart cleanly.
A daily tie re-ties fresh each morning instead of untangling overnight.
3. The Full Windsor Knot (Maximum Presence)
The Windsor is wider than most common knots – not truly symmetric, but more balanced than the four-in-hand – and suits spread and cutaway collars (Wikipedia, “Windsor knot”).
It is the only knot accepted with the Royal Australian Air Force’s service-dress tie and it makes sense because when a regiment wants presence, that knot is the perfect resume.
How to Tie a Full Windsor Knot in 8 Steps
- Collar up, seam-in, wide end on your right – start lower than for a four-in-hand; the Windsor eats the most length.
- Cross the wide end over the narrow end to your left.
- Bring it up through the neck loop.
- Drop it down across the front to your right – two diagonals now cross at the knot’s face.
- Bring it behind the knot to your left.
- Bring it back across the front to your right, low over the knot – the band you will tuck through.
- Bring it up through the neck loop again, from behind.
- Feed it down through the band from step 6, pinch the knot square, slide up, cinch. Dimple before the collar comes down.
When to Wear the Full Windsor
Wide-spread and cutaway collars, boardrooms, stages; its width balances a long, narrow face.
The caveat: it consumes the most length, so tall men and short ties land above the buckle – take the four-in-hand or Pratt instead (Wikipedia, “Pratt knot”).
A Windsor under a narrow collar is armour two sizes too big.
The Myth: The Duke Never Tied It
Named for the Duke of Windsor, but he never tied it: his wide knot was a conventional four-in-hand on thick cloth, and the Windsor was developed later by imitators using ordinary ties (Wikipedia, citing Gibbings).
His impact was proportion, not technique – for that old-school British polish, see our Oxbridge style guide.
4. The Pratt Knot (The Symmetrical Shortcut)
Invented in the late 1950s by Jerry Pratt of the US Chamber of Commerce, popularised from 1986 by TV anchor Don Shelby with clothier Kingford Bavender, then made famous by a 1989 New York Times article (Wikipedia, “Pratt knot”), the Pratt (or Shelby) is symmetrical, medium-sized, tied starting seam-out, and uses less length than either Windsor.
How to Tie a Pratt Knot in 6 Steps
- Start differently: drape the tie inside-out, seam facing out, wide end on your right about 12 inches below the narrow end.
- Cross the wide end under the narrow end, to your left.
- Bring it up through the neck loop and drop it down across the front to your right.
- Bring it across the front to your left – the horizontal band.
- Bring it up through the neck loop, from behind.
- Feed it down through the band from step 4, slide, cinch – the finished front sits smooth and symmetrical. Add the dimple.
When to Wear the Pratt Knot
Spread collars, where its symmetry earns its keep; shorter ties and taller wearers, being the most length-efficient of the four; and mornings wanting Windsor neatness in four-in-hand time.
Windsor vs Half Windsor vs Four-in-Hand Comparison Table
“Windsor knot vs half Windsor” is the question this topic gets asked most, and the answer is a table, not a sentence.
Scroll horizontally to see all columns →
| Knot | Size | Symmetry | Length used | Best fabric | Best collar | Best occasion | Steps |
|---|---|---|---|---|---|---|---|
| Four-in-hand | Small | Asymmetric lean | Least | Any, even thick knits | Narrow point, button-down | Daily business, casual | 6 |
| Half Windsor | Medium | Neat triangle | Moderate | Light to medium silks | Medium spread | Interviews, weddings | 7 |
| Full Windsor | Large | Widest, near-symmetric | Most | Medium to fine silks | Wide spread, cutaway | Boardroom, formal | 8 |
| Pratt | Medium | Symmetrical | Very little | Most, seam-out start | Spread | Fast formal mornings | 6 |
The knots we left out – Eldredge, Trinity, Van Wijk – braid the narrow end around the blade for sculptural effect, and while YouTube adores them we advise you to skip them.
Eldredge, Trinity, and Van Wijk tie knots eat the whole tie, cannot carry a dimple, and read as trick, not taste.
The Tie Dimple – How to Get It and Keep It
The tie dimple – the single crease below the knot – separates a tie that is tied from one that is worn, and it is made at the final tightening.
Index-finger method: place the finger inside the knot as you cinch, squeezing the fabric so the fold forms and stays (Charles Tyrwhitt).
Thumb method: press your thumb up into the knot while teasing the blade down (Rampley & Co, who list it as the identical final step for all three classic knots). One deep crease on fine silk; on thick knits, let the knot sit round.
How to Fix the 6 Most Common Tie Mistakes
- Crooked knot. The lean starts at the final cinch: loosen, square the knot’s face between finger and thumb, cinch evenly – never fix it by moving the collar.
- Gap between knot and collar points. The void OTAA warns of (OTAA): the knot is too small for the spread. Change the knot, not the shirt.
- Tip too long or short. The belt-buckle rule settles it (Charles Tyrwhitt): adjust the starting depth an inch at a time; if a Windsor still cannot reach, switch to the length-efficient Pratt.
- No dimple. Not a fabric defect – a missing final step. Use either method above, while cinching, before the collar comes down.
- Knot too big for your collar. A Windsor under a narrow point collar spills over the spread. Match width to gap; when unsure, size the knot down.
- Skipping the dimple. Form the dimple during the final tightening, using the index-finger or thumb method described above. Shape it before the knot is fully set, then leave it alone.
Tie Knots by Face Shape and Collar
Treat the knot as the outfit’s last proportion decision.
For example, wider knots balance long, narrow faces and slim builds under fuller spreads.
Compact knots flatter round faces by keeping vertical line and square faces take the half Windsor’s medium triangle.
The knot finishes what the collar starts – identify your face shape and collar first with our collar-styles-for-face-shapes guide.
FAQ: Tie Knots, Answered
What is the easiest way to tie a tie?
The four-in-hand – its aliases literally include “schoolboy knot”. Six moves, forgiving of imperfect drape.
Can you tie a tie in 3 or 4 steps?
Not well: the four-in-hand is the shortest honest knot at six moves, and anything shorter will not hold its shape or carry a dimple.
What is the classiest tie knot?
The one proportional to your collar and face – a dimpled four-in-hand daily, a half Windsor when photographs matter.
Which tie knots do famous and powerful men wear?
Verifiable beats gossip: the Duke of Windsor’s wide knot was a four-in-hand on thick cloth; the US Army and Navy prescribe the three classics; the RAAF mandates the full Windsor. Copy the proportion logic, not the personalities.
Is the Pratt knot self-releasing?
The documented self-releasing classic is the half Windsor’s knot 8; the Pratt behaves the same way – tied seam-out, it unwraps when you pull the narrow end.
Is the four-in-hand professional enough for interviews?
Yes – it is US Army and Navy regulation. Under a point collar with a clean dimple it is the most natural professional look; on a medium spread, take the half Windsor.
The Bottom Line – Tie It, Then Wear It Right
Four knots, one rule: the knot is proportional to the collar, the face and the lapel – never an acrobatic.
Own the four-in-hand, add the half Windsor for photographs, keep the Windsor for spread collars, file the Pratt for tall mornings and short ties.
Finish the picture – the tie bar, cufflinks and the rest of the hardware live in our guide to the jewellery and accessories wealthy men actually wear.
And when the dress code says black tie, put the necktie away: the bow tie is a separate lesson, with its own guide to come.
After years of managing hundreds of fashion brands from London's office of a global retailer, Mandy has ventured into freelancing. Connected with several fashion retailers and media platforms in the US, Australia, and the UK, Mandy uses her expertise to consult for emerging fashion brands create top-notch content as an editorial strategist for several online publications.
With years of expertise in high-end fashion collabs and a PhD in Sustainable Fashion, Ru specialises in eco-luxe wardrobes for the modern gentleman seeking understated refinement.
A passionate advocate for inclusivity and diversity, Aidan is the driving force behind The VOU as its Editorial Manager. With a unique blend of editorial acumen and project management prowess, Aidan's insightful articles have graced the pages of The Verge, WWD, Forbes, and WTVOX, reflecting his deep interest in the dynamic intersection of styling with grooming for men and beyond.
With over twenty years of front-row fashion and styling events, collabs with haute-couture houses, and a PhD in Luxury Fashion, Laurenti is an expert in crafting personalised looks that depict old-money sophistication.